以budgetvm的linux系统为例,使用Apache搭建站点。
Apache 是最常见的 Web 服务器,功能强大。如果希望使用轻量级的 Nginx ,可以跳过此部分,直接转到指南的 nginx 部分来安装。
安装 Apache2 Web 服务
VPS 默认有安装Apache2,但如果你删除了,就需要重新安装;如果没有删除,执行下面的命令会退出来,不会对系统产生任何影响。
输入如下命令安装
apt-get install apache2正常情况下会给出如下提示,说明Apache2默认已经安装好了:
root@241541:~# apt-get install apache2Reading package lists... Done
Building dependency tree... Done
apache2 is already the newest version.
0 upgraded, 0 newly installed, 0 to remove and 0 not upgraded.
开启 Apache2 的伪静态
如果希望开启Apache2 伪静态 rewrite 支持,输入如下命令安装
a2enmod rewrite正常情况下会给出如下提示,说明已经安装成功:
root@241541:~# a2enmod rewriteModule rewrite installed; run /etc/init.d/apache2 force-reload to enable.
提示需要重新加载Apache2的配置,由于下一步是安装mysql,所以暂时不用重启。
或出现如下提示,表示已经开启了 rewrite
root@241541:~# a2enmod rewriteMudule rewrite already enabled
安装 mysql 数据库服务
MySQL 是 Linux 下最常用的开源数据库。
输入如下命令安装mysql
apt-get install mysql-server如果输入正确,会提示如下信息,
root@241541:~# apt-get install mysql-serverReading package lists... Done
Building dependency tree... Done
The following extra packages will be installed:
  libdbd-mysql-perl libdbi-perl libhtml-template-perl libmysqlclient16
  libnet-daemon-perl libplrpc-perl mysql-client-5.1 mysql-client-core-5.1
  mysql-common mysql-server-5.1 mysql-server-core-5.1
Suggested packages:
  libipc-sharedcache-perl libterm-readkey-perl tinyca
The following NEW packages will be installed:
  libdbd-mysql-perl libdbi-perl libhtml-template-perl libmysqlclient16
  libnet-daemon-perl libplrpc-perl mysql-client-5.1 mysql-client-core-5.1
  mysql-common mysql-server mysql-server-5.1 mysql-server-core-5.1
0 upgraded, 12 newly installed, 0 to remove and 26 not upgraded.
Need to get 22.9MB of archives.
After this operation, 54.4MB of additional disk space will be used.
Do you want to continue [Y/n]?
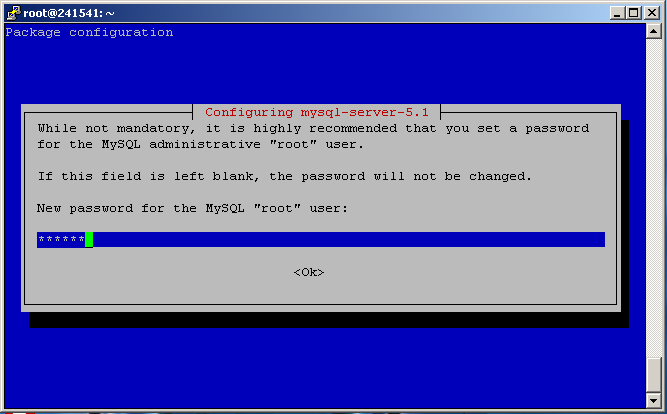
输入 Y 回车,继续安装 会提示输入 mysql 的 root 用户密码,你可以输入密码后回车,也可以不输入任何密码直接回车。 (不输入密码不会影响到Mysql的安全性,因为Mysql仅仅用于本地监听,但不输入密码会导致后续phpmyadmin无法运行)
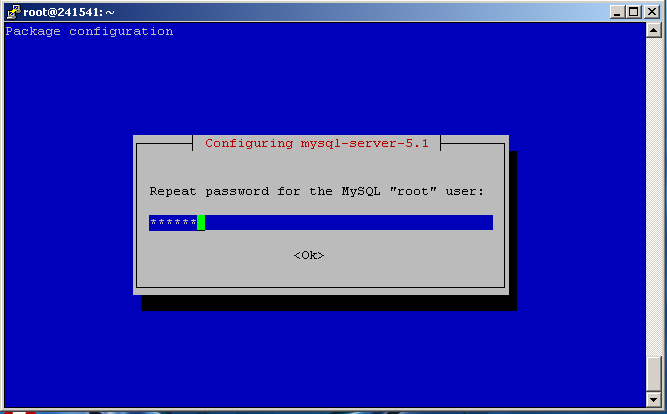
需要重新输入一遍密码,如下图所示:
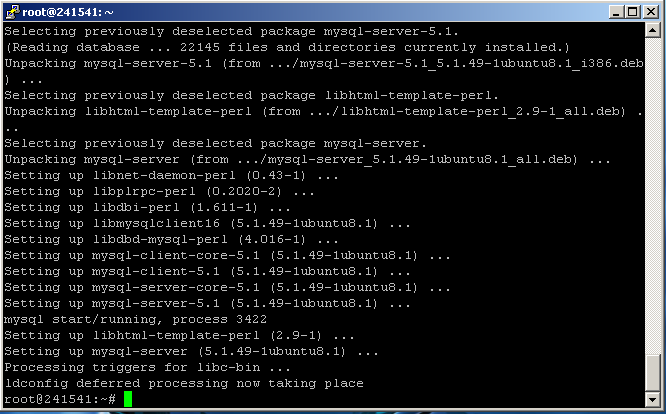
最后提示如下界面,表示mysql安装成功。
mysql 数据库管理
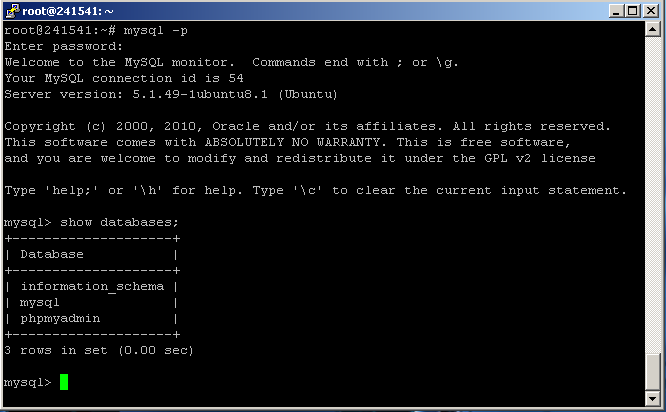
对于mysql数据库维护可以使用下面指南中安装的 phpmyadmin 进行维护,或直接在 putty 中输入 mysql -p 进行管理如图所示:
在 mysql> 的提示符下输入 quit 回车,将退出 mysql 命令,返回到正常操作提示符。
mysql 数据库优化
如果你的VPS的内存只有512M,请按如下步骤进行优化,如果是1G或以上可以忽略本步骤。执行本步骤可以将Mysql的占用内存由150M降到100M。
输入如下命令配置 Mysql
cp /etc/mysql/my.cnf /etc/mysql/my.cnf.`date +%s`
find /usr/share/doc/mysql* -name my-small.cnf -exec cp {} /etc/mysql/my.cnf \;
sed -i 's/\[mysqld\]/&\nuser            = mysql\n/' /etc/mysql/my.cnf
执行结果如下所示:
root@241541:~# cp /etc/mysql/my.cnf /etc/mysql/my.cnf.`date +%s`
root@241541:~# find /usr/share/doc/mysql* -name my-small.cnf -exec cp {} /etc/mysql/my.cnf \;
root@241541:~# sed -i 's/\[mysqld\]/&\nuser            = mysql\n/' /etc/mysql/my.cnf
重启下 Mysql服务:
service mysql restart执行结果如下所示:
root@241541:~# service mysql restartRather than invoking init scripts through /etc/init.d, use the service(8)
utility, e.g. service mysql restart
Since the script you are attempting to invoke has been converted to an
Upstart job, you may also use the restart(8) utility, e.g. restart mysql
mysql start/running, process 9886
安装php环境
执行如下命令安装apache2的php5扩展和php的mysql扩展
apt-get install libapache2-mod-php5 php5-gd php5-mysql php5-curl php5-mcrypt php5-common php-apc如下提示:
root@241541:~# apt-get install libapache2-mod-php5 php5-gd php5-mysql php5-mcrypt php5-common php-apc
Reading package lists... Done
Building dependency tree
Reading state information... Done
The following extra packages will be installed:
  libgd2-xpm libjpeg62 libt1-5 libx11-6 libx11-data libxau6 libxcb1 libxdmcp6
  libxpm4 php5-cli php5-common php-apc
Suggested packages:
  php-pear libgd-tools
The following NEW packages will be installed:
  libapache2-mod-php5 libgd2-xpm libjpeg62 libt1-5 libx11-6 libx11-data
  libxau6 libxcb1 libxdmcp6 libxpm4 php5-cli php5-common php5-gd php5-mysql php5-mcrypt
0 upgraded, 15 newly installed, 0 to remove and 26 not upgraded.
Need to get 8128kB of archives.
After this operation, 22.7MB of additional disk space will be used.
Do you want to continue [Y/n]?
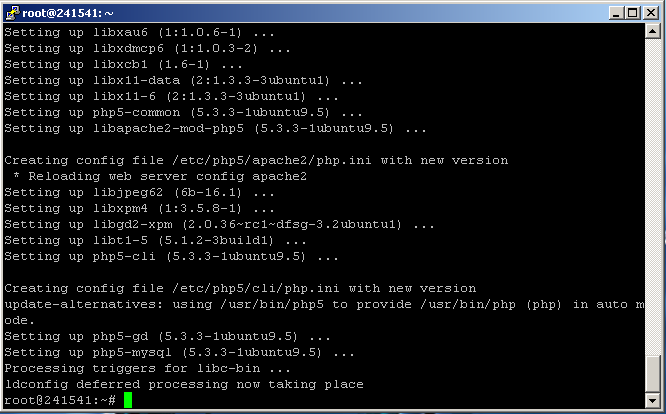
输入 Y,回车继续,以下表示安装完成。
重新启动apache2, 输入如下命令:
service apache2 restart提示如下,表示启动成功:
root@241541:~# service apache2 restart* Restarting web server apache2                                                  apache2: Could not reliably determine the server's fully qualified domain name, using 0.3.175.133 for ServerName
                                                                          [ OK ]
测试站点
以上命令已经完整安装好一台Web服务器所具有的环境,以下来搭建一个最简单的站点。
web 的根目录位于 /var/www/html 你可以将自己的程序直接放到此目录。
安装 phpsysinfo
使用putty登录到服务器,依次执行如下命令安装phpsysinfo:
cd /var/www/html
wget http://sourceforge.net/projects/phpsysinfo/files/phpsysinfo/3.0.13/phpsysinfo-3.0.13.tar.gz/download -O phpsysinfo-3.0.13.tar.gz
tar xzvf phpsysinfo-3.0.13.tar.gz
cd phpsysinfo
mv config.php.new config.php
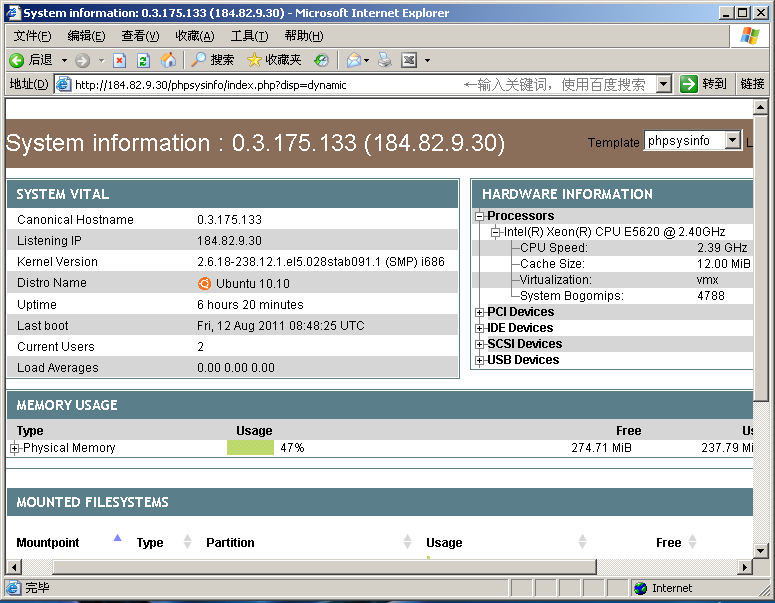
执行完毕后,在浏览器的地址输入: http://184.82.9.30/phpsysinfo/ 查看,显示如下:
安装 php 探针
使用putty登录到服务器,依次执行如下命令安装:
cd /var/www/html
wget http://www.yahei.net/tz/tz.zip
unzip tz.zip
运行结果如下所示:
root@241541:~# cd /var/www/html
root@241541:/var/www/html# wget http://www.yahei.net/tz/tz.zip
--2011-08-13 09:18:40--  http://www.yahei.net/tz/tz.zip
Resolving www.yahei.net... 110.34.192.14
Connecting to www.yahei.net|110.34.192.14|:80... connected.
HTTP request sent, awaiting response... 200 OK
Length: 16087 (16K) [application/zip]
Saving to: `tz.zip'

100%[======================================>] 16,087      --.-K/s   in 0.07s

2011-08-13 09:18:41 (152 KB/s) - `tz.zip' saved [16,087/16,087]

root@241541:/var/www/html# unzip tz.zip
Archive:  tz.zip
  inflating: tz.php
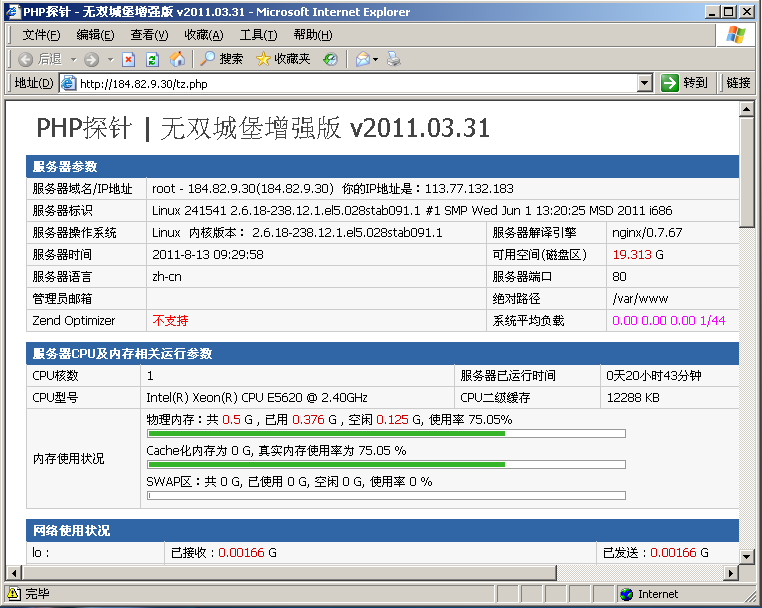
执行完毕后,在浏览器的地址输入: http://184.82.9.30/tz.php 查看,显示如下:
安装 phpmyadmin
安装phpmyadmin,需要mysql事先配置好root的密码。
使用putty登录到服务器,执行下面安装
apt-get install phpmyadmin提示如下:
root@241541:~# apt-get install phpmyadminReading package lists... Done
Building dependency tree
Reading state information... Done
The following extra packages will be installed:
  dbconfig-common javascript-common libjs-mootools libmcrypt4 php5-mcrypt
  wwwconfig-common
Suggested packages:
  libmcrypt-dev mcrypt postgresql-client apache apache-ssl
The following NEW packages will be installed:
  dbconfig-common javascript-common libjs-mootools libmcrypt4 php5-mcrypt
  phpmyadmin wwwconfig-common
0 upgraded, 7 newly installed, 0 to remove and 26 not upgraded.
Need to get 5184kB of archives.
After this operation, 21.3MB of additional disk space will be used.
Do you want to continue [Y/n]?
输入 Y, 回车继续。
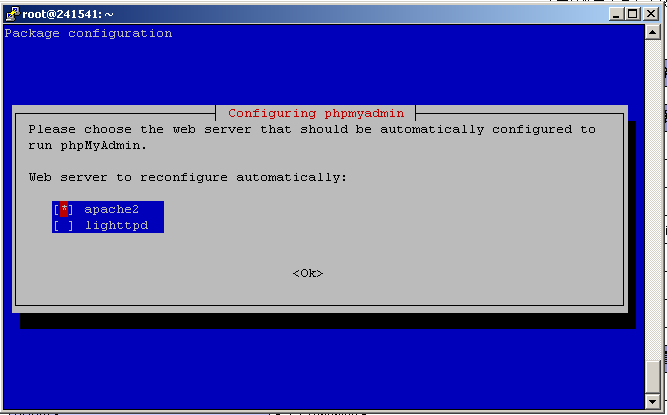
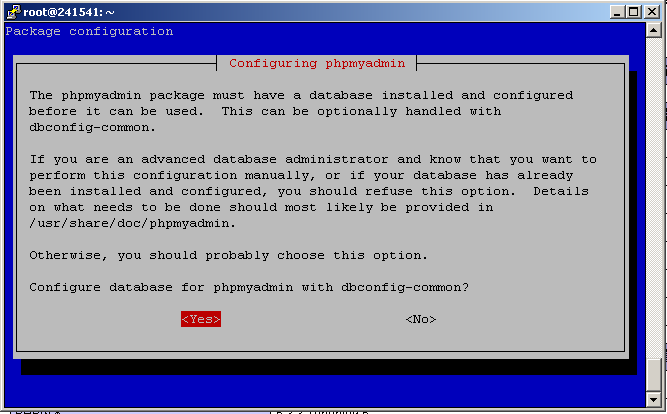
选择完毕后,回车继续,提示如下图,是否需要创建phpmyadmin数据库,
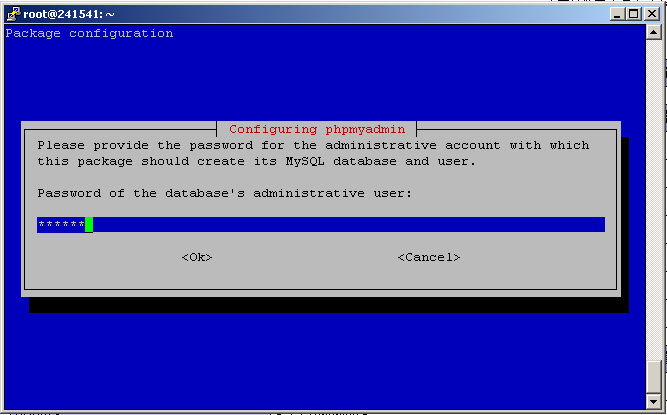
直接回车继续,提示输入mysql的管理员密码,输入后如下所示:
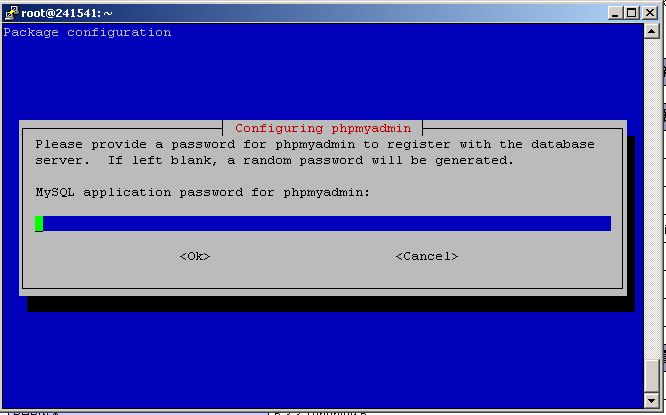
回车继续后,如下图,提示输入phpmyadmin连接数据的密码,直接回车由系统随机产生一个即可。
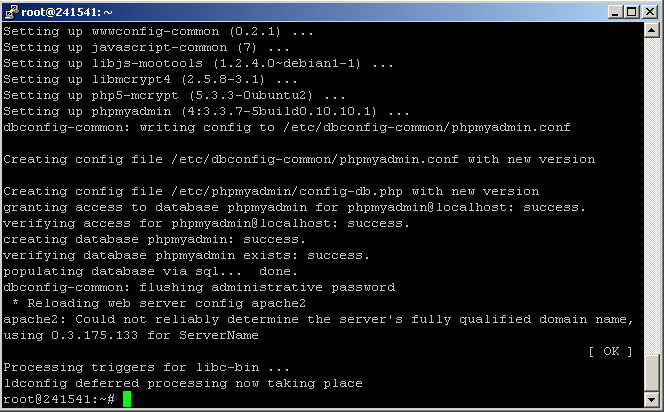
完成安装提示如下:
现在访问如下地址测试: http://184.82.9.30/phpmyadmin/
如果打开提示 404 错误,即 Not Found ,在putty里面执行如下命令:
ln -s /usr/share/phpmyadmin /var/www/html/然后再访问,如下:
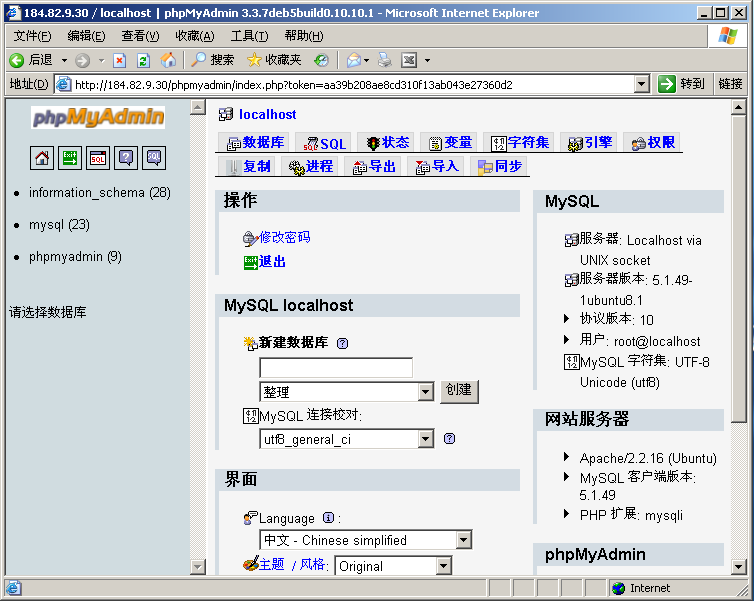
输入mysql的root帐号和mysql的密码,点击 执行 进行登录,进行正常访问如下:
配置虚拟站点
假设前提: 你有一个域名 test.com ,你希望搭建两个站点,第一个站点是 www.test.com 和 test.com 为主页,同时希望提供 bbs.test.com 为论坛。
注意,下面的文档对多个不同的域名也是适用的。
配置域名
去域名商提供的面板将 test.com 域名的 A 记录修改为 VPS 的 IP.
上传程序
约定两个站点的目录如下,为了方便备份,站点的目录最好集中存放在 /var/www/html 目录。
www.test.com(test.com) 对应目录: /var/www/html/test
bbs.test.com 对应目录: /var/www/html/bbs
假设主站点安装帝国的CMS程序,论坛采用DZ的论坛,程序需要下载UTF-8的版本。
使用前面提到的上传方法,利用 FileZilla 连接服务器,创建这两个目录。
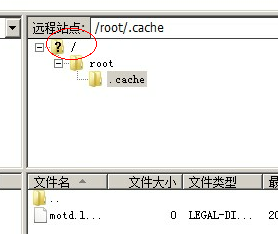
如果找不到如上图的目录,请点击 / 即可看到了。
创建目录后,分别上传程序,如下:
多域名配置
这里推荐编辑器直接使用记事本,不要使用其他的高级编辑器。
注意下面的 DocumentRoot /var/www/html/test/ 中的 /var/www/html/test/ 应该修改为你上传站点的文件目录。
编辑www.test.com的站点配置文件test.com.txt ,其中站点 http://www.test.com 和 http://test.com 的网站目录为 /var/www/html/test/
<VirtualHost *:80>
    ServerName www.test.com
    ServerAlias test.com
    DocumentRoot /var/www/html/test/
</VirtualHost>
编辑bbs.test.com的站点配置文件 bbs.test.com.txt , 其中站点 bbs.test.com 的网站目录为 /var/www/html/bbs/
<VirtualHost *:80>
    ServerName bbs.test.com
    DocumentRoot /var/www/html/bbs/
</VirtualHost>
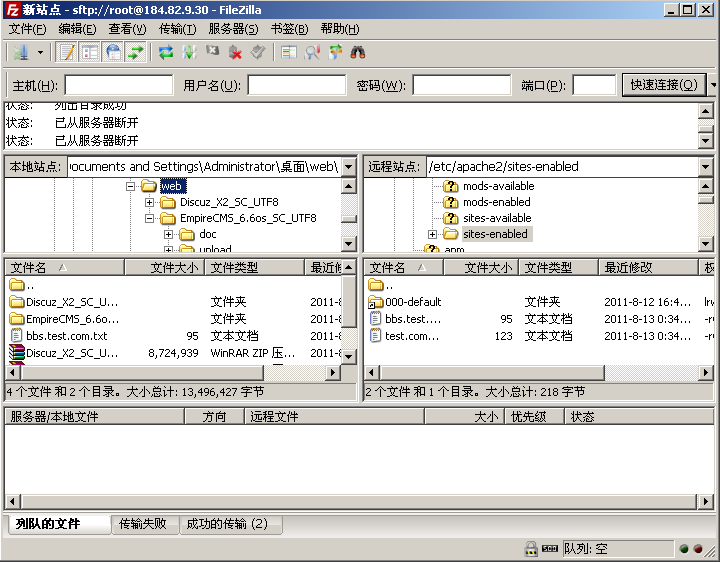
如图所示:
将这两个文件上传到 /etc/apache2/sites-enabled/ 目录
如图所示:
Apache2 伪静态
有两种方法做伪静态,一种是用 .htaccess 文件。 例如将上面的 bbs.test.com 的站点配置文件编辑为如下:
<VirtualHost *:80>
    ServerName bbs.test.com
    DocumentRoot /var/www/html/bbs/
    <Directory /var/www/html/bbs/>
          AllowOverride AuthConfig
    </Directory>
</VirtualHost>
重新上传,重启 apache2 后, 然后将准备好的 .htaccess 文件放到对应的 /var/www/html/bbs/ 网站根目录即可。
另外一种是直接加入到配置文件,如下:
<VirtualHost *:80>
    ServerName bbs.test.com
    DocumentRoot /var/www/html/bbs/
    #伪静态代码段开始
    <Directory /var/www/html/bbs/>
       ...............................
    </Directory>
    #伪静态代码段结束
</VirtualHost>
下面是常用的一些伪静态配置,复制出来,保存为 .htaccess 文件,或 插入到站点的配置文件最后一行 <Directory> 和 </Directory> 之间。
Discuz!X 在 Apche2 下的伪静态配置如下:
RewriteEngine On
          RewriteRule ^forum-(\w+)-([0-9]+)\.html$ forum.php?mod=forumdisplay&fid=$1&page=$2
          RewriteRule ^thread-([0-9]+)-([0-9]+)-([0-9]+)\.html$ forum.php?mod=viewthread&tid=$1&extra=page\%3D$3&page=$2
          RewriteRule ^topic-(.+)\.html$ portal.php?mod=topic&topic=$1
          RewriteRule ^article-([0-9]+)\.html$ portal.php?mod=article&articleid=$1
          RewriteRule ^group-([0-9]+)-([0-9]+)\.html$ forum.php?mod=group&fid=$1&page=$2
          RewriteRule ^space-(username|uid)-(.+)\.html$ home.php?mod=space&$1=$2
          RewriteRule ^([a-z]+)-(.+)\.html$ $1.php?rewrite=$2
将这一段代码加入到上面的站点配置文件中,如下:
<VirtualHost *:80>
    ServerName bbs.test.com
    DocumentRoot /var/www/html/bbs/
    <Directory /var/www/html/bbs/>
RewriteEngine On
          RewriteRule ^forum-(\w+)-([0-9]+)\.html$ forum.php?mod=forumdisplay&fid=$1&page=$2
          RewriteRule ^thread-([0-9]+)-([0-9]+)-([0-9]+)\.html$ forum.php?mod=viewthread&tid=$1&extra=page\%3D$3&page=$2
          RewriteRule ^topic-(.+)\.html$ portal.php?mod=topic&topic=$1
          RewriteRule ^article-([0-9]+)\.html$ portal.php?mod=article&articleid=$1
          RewriteRule ^group-([0-9]+)-([0-9]+)\.html$ forum.php?mod=group&fid=$1&page=$2
          RewriteRule ^space-(username|uid)-(.+)\.html$ home.php?mod=space&$1=$2
          RewriteRule ^([a-z]+)-(.+)\.html$ $1.php?rewrite=$2    </Directory>
</VirtualHost>
WordPress 在 Apache2 下的伪静态配置如下:
<Directory />
          RewriteEngine On
          RewriteRule ^index\.php$ - [L]
          RewriteCond %{REQUEST_FILENAME} !-f
          RewriteCond %{REQUEST_FILENAME} !-d
          RewriteRule . /index.php [L]
    </Directory>
ECShop 在 Apache2 下的伪静态配置如下:
<Directory />
          RewriteEngine On
          RewriteRule ^(.*)/index.html$ $1/index\.php [I]
          RewriteRule ^(.*)/category$ $1/index\.php [I]
          RewriteRule ^(.*)/feed-c([0-9]+).xml$ $1/feed\.php\?cat=$2 [I]
          RewriteRule ^(.*)/feed-b([0-9]+).xml$ $1/feed\.php\?brand=$2 [I]
          RewriteRule ^(.*)/feed-type([^-]+)\.xml$ $1/feed\.php\?type=$2 [I]
          RewriteRule ^(.*)/feed.xml$ $1/feed\.php [I]
          RewriteRule ^(.*)/category-([0-9]+)-b([0-9]+)-min([0-9]+)-max([0-9]+)-attr([^-]*)-([0-9]+)-(.+)-([a-zA-Z]+)(.*)\.html$ $1/category\.php\?id=$2&brand=$3&price_min=$4&price_max=$5&filter_attr=$6&page=$7&sort=$8&order=$9 [I]
          RewriteRule ^(.*)/category-([0-9]+)-b([0-9]+)-min([0-9]+)-max([0-9]+)-attr([^-]*)\.html$ $1/category\.php\?id=$2&brand=$3&price_min=$4&price_max=$5&filter_attr=$6 [I]
          RewriteRule ^(.*)/category-([0-9]+)-b([0-9]+)-([0-9]+)-(.+)-([a-zA-Z]+)(.*)\.html$ $1/category\.php\?id=$2&brand=$3&page=$4&sort=$5&order=$6 [I]
          RewriteRule ^(.*)/category-([0-9]+)-b([0-9]+)-([0-9]+)(.*)\.html$ $1/category\.php\?id=$2&brand=$3&page=$4 [I]
          RewriteRule ^(.*)/category-([0-9]+)-b([0-9]+)(.*)\.html$ $1/category\.php\?id=$2&brand=$3 [I]
          RewriteRule ^(.*)/category-([0-9]+)(.*)\.html$ $1/category\.php\?id=$2 [I]
          RewriteRule ^(.*)/category-([0-9]+)-b([0-9]+)\.html(.*)$ $1/category\.php\?$4&id=$2&brand=$3
          RewriteRule ^(.*)/goods-([0-9]+)(.*)\.html$ $1/goods\.php\?id=$2 [I]
          RewriteRule ^(.*)/article_cat-([0-9]+)-([0-9]+)-(.+)-([a-zA-Z]+)(.*)\.html$ $1/article_cat\.php\?id=$2&page=$3&sort=$4&order=$5 [I]
          RewriteRule ^(.*)/article_cat-([0-9]+)-([0-9]+)(.*)\.html$ $1/article_cat\.php\?id=$2&page=$3 [I]
          RewriteRule ^(.*)/article_cat-([0-9]+)(.*)\.html$ $1/article_cat\.php\?id=$2 [I]
          RewriteRule ^(.*)/article-([0-9]+)(.*)\.html$ $1/article\.php\?id=$2 [I]
          RewriteRule ^(.*)/brand-([0-9]+)-c([0-9]+)-([0-9]+)-(.+)-([a-zA-Z]+)\.html $1/brand\.php\?id=$2&cat=$3&page=$4&sort=$5&order=$6 [I]
          RewriteRule ^(.*)/brand-([0-9]+)-c([0-9]+)-([0-9]+)(.*)\.html $1/brand\.php\?id=$2&cat=$3&page=$4 [I]
          RewriteRule ^(.*)/brand-([0-9]+)-c([0-9]+)\.html(.*)$ $1/brand\.php\?$4&id=$2&cat=$3 [I]
          RewriteRule ^(.*)/brand-([0-9]+)-c([0-9]+)(.*)\.html $1/brand\.php\?id=$2&cat=$3 [I]
          RewriteRule ^(.*)/brand-([0-9]+)(.*)\.html $1/brand\.php\?id=$2 [I]
          RewriteRule ^(.*)/tag-(.*)\.html $1/search\.php\?keywords=$2 [I]
          RewriteRule ^(.*)/snatch-([0-9]+)\.html$ $1/snatch\.php\?id=$2 [I]
          RewriteRule ^(.*)/group_buy-([0-9]+)\.html$ $1/group_buy\.php\?act=view&id=$2 [I]
          RewriteRule ^(.*)/auction-([0-9]+)\.html$ $1/auction\.php\?act=view&id=$2 [I]
          RewriteRule ^(.*)/exchange-id([0-9]+)(.*)\.html$ $1/exchange\.php\?id=$2&act=view [I]
          RewriteRule ^(.*)/exchange-([0-9]+)-min([0-9]+)-max([0-9]+)-([0-9]+)-(.+)-([a-zA-Z]+)(.*)\.html$ $1/exchange\.php\?cat_id=$2&integral_min=$3&integral_max=$4&page=$5&sort=$6&order=$7 [I]
          RewriteRule ^(.*)/exchange-([0-9]+)-([0-9]+)-(.+)-([a-zA-Z]+)(.*)\.html$ $1/exchange\.php\?cat_id=$2&page=$3&sort=$4&order=$5 [I]
          RewriteRule ^(.*)/exchange-([0-9]+)-([0-9]+)(.*)\.html$ $1/exchange\.php\?cat_id=$2&page=$3 [I]
          RewriteRule ^(.*)/exchange-([0-9]+)(.*)\.html$ $1/exchange\.php\?cat_id=$2 [I]
    </Directory>
修改上传文件权限
由于上传的文件的所有者为 root ,Apache 无法正常写入,所以需要设置上传文件的宿主为 www-data。
使用putty登录vps执行如下命令,设置 /var/www下的所有文件的宿主都是 www-data,这样apache2就可以正常读写:
chown -R www-data:www-data /var/www
service apache2 restart
执行结果如下所示:
root@241541:~# chown -R www-data:www-data /var/www
root@241541:~# service apache2 restart * Restarting web server apache2                                                apache2: Could not reliably determine the server's fully qualified domain name, using 0.3.175.133 for ServerName
 ... waiting apache2: Could not reliably determine the server's fully qualified domain name, using 0.3.175.133 for ServerName
[ OK ]
安装配置
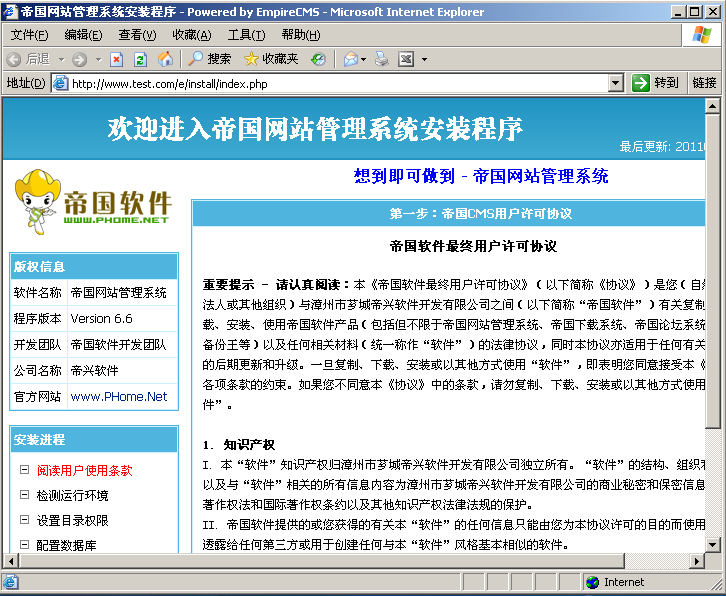
主站点程序访问 http://www.test.com 如下图所示,进一步安装:
论坛程序访问 http://bbs.test.com 如下图所示,进一步安装:
以上就是完成多域名的配置。
Apache2 301 跳转
如果希望将 test.com 跳转到 www.test.com ,如下配置 test.com.txt 上传到 /etc/apache2/sites-enabled/ 目录即可。
<VirtualHost *:80>
    ServerName test.com
    RewriteCond %{HTTP_HOST} ^test\.com [NC]
    RewriteRule ^(.*)$ http://www.test.com/$1 [L,R=301]
</VirtualHost>
当然你也可以去 test.com 的域名那里设置 301 跳转。
Apache2 优化
请一定要执行本步骤,不要认为小站,访问的人数少,有时候蜘蛛会按照超过20个以上的并发抓取数据,直接爆掉vps。表现为:可以ping,但网站打不开、数据库连不上或无法ssh。
为了防止Vps被大的访问量爆掉,需要限制并发数,这里#1 VPS 调整为10, #2可以将下面的10修改为20,#3为30,以此类推。
也可以根据指南最后的压力测试来确定最大并发数,确定后,将下面的命令中的 10 改为你确定的并发数即可,其它数值如 5 不要修改。
请复制命令后到putty直接按鼠标右键粘贴执行:
sed -i -e "s/^[[:blank:]]*StartServers[[:blank:]]*.*/StartServers       5/" \
       -e "s/^[[:blank:]]*MinSpareServers[[:blank:]]*.*/MinSpareServers    5/" \
       -e "s/^[[:blank:]]*MaxSpareServers[[:blank:]]*.*/MaxSpareServers    10/" \
       -e "s/^[[:blank:]]*ServerLimit[[:blank:]]*.*/ServerLimit       10/" \
       -e "s/^[[:blank:]]*MaxClients[[:blank:]]*.*/MaxClients        10/" \
       -e "s/^[[:blank:]]*MinSpareThreads[[:blank:]]*.*/MinSpareThreads    5/" \
       -e "s/^[[:blank:]]*MaxSpareThreads[[:blank:]]*.*/MaxSpareThreads    10/" /etc/apache2/apache2.conf
执行完毕后后,再执行以下命令,重启下apache2。
service apache2 restart执行结果如下所示:
root@241541:~# sed -i -e "s/^[[:blank:]]*StartServers[[:blank:]]*.*/StartServers       5/" \
>       -e "s/^[[:blank:]]*MinSpareServers[[:blank:]]*.*/MinSpareServers    5/" \
>       -e "s/^[[:blank:]]*MaxSpareServers[[:blank:]]*.*/MaxSpareServers    10/" \
>       -e "s/^[[:blank:]]*ServerLimit[[:blank:]]*.*/ServerLimit       10/" \
>       -e "s/^[[:blank:]]*MaxClients[[:blank:]]*.*/MaxClients        10/" \
>       -e "s/^[[:blank:]]*MinSpareThreads[[:blank:]]*.*/MinSpareThreads    5/" \
>       -e "s/^[[:blank:]]*MaxSpareThreads[[:blank:]]*.*/MaxSpareThreads    10/" /etc/apache2/apache2.conf
root@241541:~# service apache2 restart * Restarting web server apache2                                                apache2: Could not reliably determine the server's fully qualified domain name, using 0.4.54.225 for ServerName
 ... waiting apache2: Could not reliably determine the server's fully qualified domain name, using 0.4.54.225 for ServerName
                                                                         [ OK ]
查看 Apache2 日志
Apache2的日志放在 /var/log/apache2/ 目录下,可以直接使用filezilla去下载下来看。
